![]()
-
Introduction
“Where is the song that goes with this story? And the Sword drill I had ready? They’ve been knocking around for months. Now, when I need them to teach this Bible story, I can’t find what I need!”
Bible Teacher, does this sound like you? It was my complaint so many times that I decided to do something about organizing my Christian Education materials. Perhaps my system will help you too.
Instructions below will help you organize as you— 
Number Resources
Index Resources
Sort Resources by Scripture Reference
-
Numbering Resources
Assigning Chronological Numbers to Each Bible Story
First, assign a chronological number to each major Bible event or person; for example, Creation and Adam is #1; The Fall, #2, etc. Click here for these numbers: Bible Chronology Numbers
On a manila envelope (landscape orientation with opening at the top), write the number of the story, its title, and the Scripture reference. Click here for ready-made labels for your envelopes: Labels for Chronology and Scripture Storage Envelopes
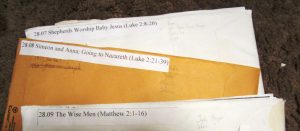
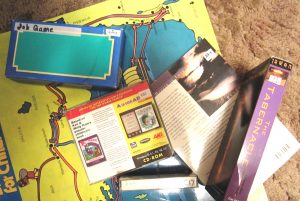
Into each envelope place for that story all the loose resources available—a copy of the written-out story, flashcards of the terms to be learned in the story, extras (e.g., a commentary note or a puzzle), visual aids, handwork, even notes about the location of larger visual aids, etc.).
File all these envelopes in numerical (chronological) order. This is the first place to go when teaching a lesson.
Numbering resources containing more than one Scripture reference
Now, what about all those coloring books, flannelgraph series, maps, toys, and teacher resource books that contain several stories? Sort, number, and index them by the type of storage they require (see “Indexing Resources” below). Here are my categories:
- (#) items that can be stored in file cabinets (See “Numbering items that can be kept in file cabinets” below.)
- Books by size: (BL) large—larger than about 6”x 8”, (BM) medium—about 6”x 8”, (BS) small—smaller than 6”x 8”. (See “Numbering books” below.)
- (BR) books of reference for teachers
- (BB) bulletin board items
- (C) cassette tapes
- (CD) CDs
- (D) DVDs
- (FB) flannel backgrounds
- (FS) flannelgraph series (stored in sheet protectors within binders)
- (G) games
- (M) maps and charts
- (O) objects (e.g., wheat, coins)
- (S) visualized songs
- (T) toys and puppets
- (V) VHSs
Numbering items that can be kept in file cabinets
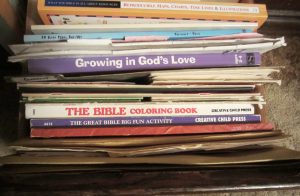
Many 8.5 x 11” (and smaller) resources like coloring books, thin volumes of flannelgraph stories, activity ideas, etc., fit easily in a standard file cabinet. If items must be filed in wide drawers in a different location, a note in its numerical order listing the number and its location tracks that item. However, it might be wise, if you have the option, to stick with legal-sized file cabinets since lots of resources require larger drawers.
First, collect all of these items in one place. You may sort them by Bible chronology, but it is not necessary. Besides, as you add resources later, they will not fall into chronological sequence.
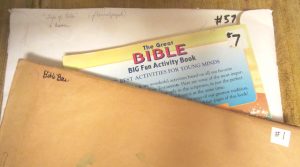
Number all these items, #1, #2, etc. with a permanent marker in a consistent location. If an item is in a manila envelope, write at the top of the envelope a short description or the title of its contents (e.g., Junior SS manual on Joseph #9.) You will later index these items, but you may temporarily file them with the numbers facing the front of the file drawer.
Numbering books
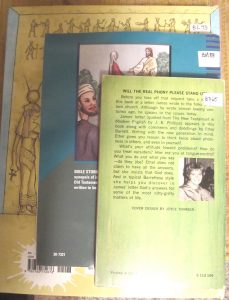
Generally, these are hardbound or soft-cover books for student use and are stored in places other than file cabinets. I use narrow open-topped boxes (8x12x3.5”) that can hold several books. (Laundry boxes also work well.) These labeled boxes (e.g., BS 14–24) rest on bookcase shelves.
Place a sticker in a consistent location on a book before numbering it (e.g, BM 34, indicating this book is the 34th medium-sized book numbered). Use a permanent marker. You might also want to write in parentheses the chronological number of the book’s Bible character (e.g., 28—Jesus) at the bottom of the sticker. Store books in numerical order.
Numbering the other categories
Use the letters for the other categories listed above with numbers on those items (e.g. O-4 on an object; G 9 on a game.)
-
Indexing Resources
(Do “Numbering Resources” before indexing.)
So, I’ve got all my resources numbered. Now, how do I connect them to the story I’m teaching?
Frankly, this is a time-consuming task, but it is worth the effort. Here we go.
Prepare a document entitled “Bible Story Index.” (Some people prefer to use a spread sheet; I prefer to use a table and will give instructions with a table in mind.) Insert a table with up to ten columns labeled as follows (choose the designations you wish to use):
- Scripture (2-inch column): Scripture reference for the resource (This column is mandatory.)
- Story Title (2-inch column): (This column is very helpful.)
- Source (1/2-inch column): Publisher of the resource
- # (1/2-inch column): The number you have assigned to this resource (This column is mandatory.)
- Page (1/4-inch column): The page number on which the resource for this story begins
- Location (1/4-inch column): Use if storing resources in multiple locations
- V=Visuals (1/4-inch column): Place an X in this column if resource has visuals.
- S=Story (1/4-inch column): Place an X in this column if resource has a story.
- X=Extras (1/4-inch column): Place an X in this column if resource has extras, e.g., games, songs, handwork.
- A=Age (1/4-inch column): N=Nursery; Pr=Preschool; K=Kindergarten; P=Primary; J=Junior; MS=Junior High or Middle School; HS=High School; A=Adult
Filling in the Scripture column
This column might be the most difficult to fill in, but it is the basis for locating materials for each story.
Take in hand your first (#1) resource that is in the file cabinet. Determine the Scripture reference for the first page of the resource. Hopefully, it is written on the page or somewhere within the particular lesson/selection. If not, refer to the “Chronology with Scripture” chart to find the Scripture reference. Type that reference into the first column under “Scripture.” If an item just does not fit any particular Scripture reference, you might make a separate index table that lists subjects (e.g., justice, lying, prayer) alphabetically.
Format and abbreviations in the Scripture column
Bible books: Use as short an abbreviation as you can without periods in order to save time and space. Be consistent; e.g., Josh or Jos, not both. (Some Bibles show Bible-book abbreviations in the Table of Contents.)
Chapters and verses: So that you can sort your references alphabetically and numerically after you have entered all the information, it is important to use zeros as place holders in both chapter numbers and verse numbers; e.g., Gen 05:01. Psalms is the only book that will need three places in the psalm number (psalms are not chapters), and Psalm 119 will need three places for the verse; e.g., Psa 086:01 for Psalm 86:1 and Psa 119:145 for, obviously, Psalm 119:145. If a book has fewer than ten chapters or a chapter has fewer than ten verses, only one digit is necessary for that item; e.g., Ru 3:09 or Jer 45:5.
Filling in the other columns
For every resource you have already numbered, fill in the columns of the prepared table. This part of organizing is the most time-consuming.
Sorting resources by Scripture reference
Now that all resources have been indexed, sort the information in the table so that all similar references can be found together as in the above example. The index will be in alpha/numeric, not Biblical, order. Use this index table to find all the resources you have on a particular Scripture reference. I usually copy and paste the part of the index that matches my story into a new document. This printed copy stays in my envelope for that story.
NOTE!! If you do not know how to sort a table, check your word processor’s Help function. Be careful! You will be selecting the entire table! In order to avoid deleting all of your index work, be sure to have a saved copy of the index before sorting.
Here is an example of a sorted index:
| Scripture | Story | Source | # | Page | Locat | V | S | X | Age |
| 1 Cor; 2 Cor | Corinth in the Time of Paul (diagram) | GosLit | #78 | 235 | x | J | |||
| 1 Kings 03 | Wise King Solomon | FaitRts | #82 | 16 | x | x | K | ||
| 1 Kings 01–14; 2 Chron 01–12 | Two Kinds of Wisdom | NavPr | #BM7 | 107 | X | J | |||
| 1 Kings 06, 07 | Solomon’s Temple Diagram | GosLit | #M27 | x | P | ||||
| Ex 02:01-10 | Moses and the Princess | Stand | #T2 | x | x | Pr | |||
| Ex 02:01-10 | Moses in the Bulrushes | Stand | #BL8 | x | x | Pr | |||
| Ex 19; 20; 25:08, 09 | Moses and the Ten Commandments | Plamor | #G2 | All | X | Pr |
With my index completed, I can see what resources I have for the Scripture, Exodus 2:1-10. I can go to my toy storage box to find T2 and to my bookcase to find BL8 and decide whether or not to use these resources when I teach this lesson.
-
Numerical lists
Keeping digital numerical lists of one’s resources is useful for inventory or reminding oneself about the content of the resource. The following are examples of numerical lists.
Resources in a file cabinet:
| # | Title | Author | Publ. | Pgs | Comments |
| 1 | Bible Bees | Ilse Lefton Schlaitzer | ChPub | 27 | Original wkbk has line drawings of 10 Bible stories and review quest; lady from CBC typed stories, quest., and made hive std wkbks; “Bees” are “be’s”—obedient, etc |
| 2 | 7 C’s of History | Stacia McKeever | Creation Education Center | 7 – 12×18” black & white laminated posters; lesson summaries and suggested resources; Creation, Corruption, Catastrophe, Confusion, Christ, Cross, Conclusion (stored with maps and charts) |
Cassettes:
| C29 | The Bible: The Amazing Book | Sparrow | Lively songs; Side 1: The Amazing Book; The Good Book; The Writers of the Bible; The Divine Library; Sixty-Six Books; A Story-Telling BookSide 2: The Amazing Book (reprisei); Through History; Believe It or Not; His Story; Bible Medley–The B-I-B-L-E, Every Promise in the Book, Read Your Bible; Letter of Love; The Amazing Book (chorus) |
Compact Discs (CDs):
| CD3 | Grandma Sings Bible Songs | Marilyn Alexander | OT story songs from Genesis and Exodus | ||
| CD4 | Each Little Dewdrop | Charlotte E. Couchman | Taylor | 34 songs | Book goes with the CD (keep together) Mostly Bible story songs; quite good |
Games:
| G1 | Moses Knows the Ten Commandments | Cook | 100 cards; object of game is to collect all 10 commandments; requires reading and reasoning | ||
| G2c. 1, 2 | Moses and the Ten Commandments (2 copies) | Plamor | 12-piece puzzle of Moses holding tablets on mountain |
Maps and Charts:
| M31 | Middle East | 8.5×14”; Route of Abraham; has well locations, pics, and descriptions of wells from Genesis and Exodus | |||
| M32 | Map of Israel | 8.5×14; (on back of M31) blue |
Objects:
| O-6a&b | Roll-up Bed/Mat | a) 18” Purple place mat w/“poles” and strings; b) poster board man to lie on mat | |||
| O-7 | Wheat | Wheat plants (just a few) with seeds in husk |
Songs:
| S34 c. 2 | Gen 1:1 ff. In the beginning | M. Alexander | CBC | 2/L | 28×22”; white bkgrd; tune Grandfather’s Clock |
| S36a | B-A-B-E-L | Wds by M. Alexander | Cal Cl | 1/L | 28×18”; blue bkgrd; tune “B-I-N-G-O” |
| S36b | God Said Scatter | M. Alexander | Cal Cl | 1/L | 28×18”; blue bkgrd |
Copyright 2026© teachingthebibletokids.org
All rights reserved. See Home Page for details.